Changelog
Follow up on the latest improvements and updates.
RSS
You can now organize your StoryPrompts into folders — making it easy to manage collections, campaigns, or team libraries without losing track of what's where.

To get started:
- Open your prompt dashboard and click Create folder in the sidebar.
- Give your folder a name, pick an icon from 16 options, and choose a color to make it yours.
- Drag and drop prompts into folders, between folders, or reorder folders however you like.

A few things worth knowing:
- Folders expand and collapse to keep your sidebar tidy. An orange dot appears on a folder when prompts inside have new replies.
- You can also move a prompt into a folder from its own menu — useful if you already have prompts and want to organize them without dragging.
- Deleting a folder also deletes all prompts inside it, so make sure you move any prompts you want to keep out of the folder before deletng.
- Team workspaces fully support folders. Admins and moderators can create and manage them, and folders can be moved between personal and workspace accounts.
Folders are especially handy if you run multiple campaigns, manage prompts for different clients, or just want a cleaner way to navigate a growing library.
You can now set a date to automatically stop accepting responses to your StoryPrompt. Once the date passes, the prompt is disabled and respondents will see a custom message you've set.
To set this up:
- Open your StoryPrompt and go to the Welcome Page settings.
- Toggle on Auto-disable responses.
- Pick a closing date using the date picker.
- Optionally, add a custom message to show respondents after the prompt closes.
When a scheduled disable is active, the prompt will show "Until <date>" so you always know at a glance when it's set to close.
This is useful for time-limited campaigns, event-based testimonial collection, or any prompt you only want open for a fixed window.

You can now choose to collect a respondent's contact info at the start at the flow, before they submit a response. You'll find this option in your Contact Form Page settings on your StoryPrompt:

You can now automatically email the respondent after they've submitted their response.
- From your StoryPrompt Configuration, click Delivery & Notifications.
- Under Action to take, select Email the respondent.

- Customize the email.

- Once you're ready click Preview to check how it will look. It will automatically apply the branding you're using on your StoryPrompt.

- Save all your settings and you're ready!
You can now give respondents helpful talking points that appear on screen while they record. This helps them stay focused and deliver better responses.
To add a script:
- Edit one of your prompts
- Scroll down to the Respondent Guidance section
- Add talking points or a script outline

When your respondent starts recording their reply, the script will be automatically displayed on screen with our built-in teleprompter while they record:

When setting up your prompt, you can now turn off the ability for respondents to submit voice responses and/or screen recordings. This gives you even more control over the collection process.

You can now add custom code to your StoryPrompts. This means you can embed things like retargeting pixels, Google Tags, custom widgets, and more!
To add your code, simply click on Branding & Design from within your StoryPrompt configuration and choose whether to add the code to your StoryPrompt's
<head>
or <body>
.Examples of what you can add:
- Google Analytics or Facebook Pixel for tracking and retargeting
- Custom CSS for advanced styling and branding
- Live chat widgets or customer support tools
- Heatmap tools like Hotjar for user behavior insights
- A/B testing scripts to optimize performance
- Custom fonts or design elements beyond standard options

Note: This feature is available on any of our paid plans.
When writing your welcome and thank you page descriptions, you can now use rich text formatting to make your instructions more readable. Simply highlight your text to change the formatting, make it a heading, add a link, or turn it into a list.

💡Tip:
Need to embed an image? Drag it directly into the box and it will be uploaded and displayed along with your content. You can now adjust the alignment of the text of your prompt — giving you more control over how your StoryPrompt looks and feels. Whether you want it centered, left-aligned, or right-aligned, it’s up to you.

You can now edit the size of your logo that appears in produced videos. You can do this in both the Video Studio or when configuring your StoryPrompt collection flow so that it's applied automatically for you.
StoryPrompt collection flow
- Go to Branding & Design
- Select the Logo tab
- Upload a logo (if you haven't already)
- Under "Adjust logo positioning for each step", select Video.
- Adjust the position and size of your logo.

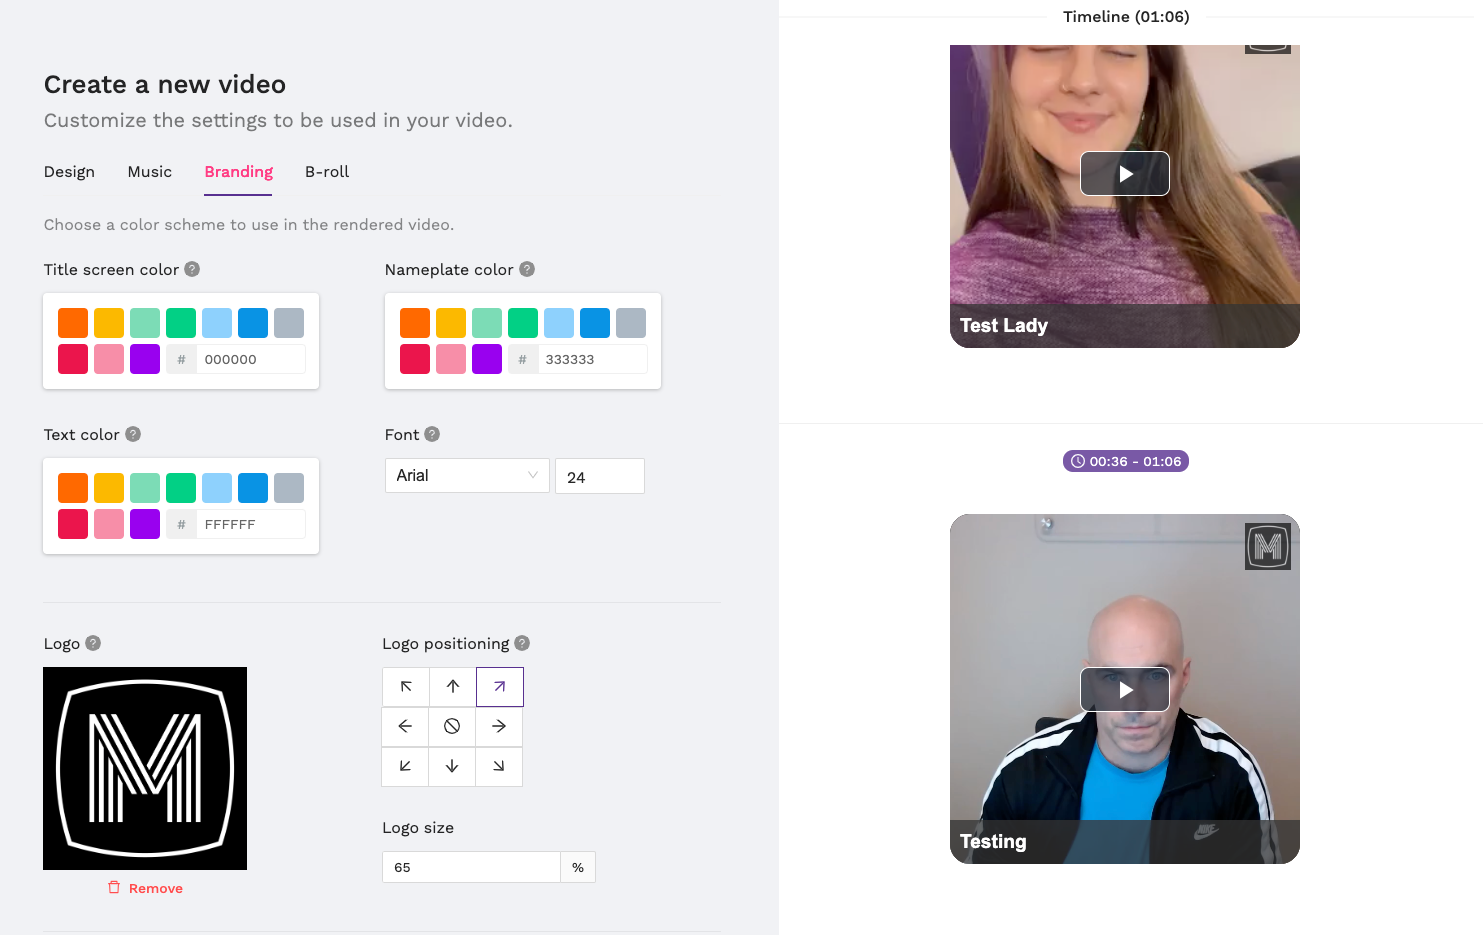
Video studio
- Go to the Branding tab.
- Upload a logo (if you haven't already)
- Use "Logo positioning" and "Logo size" to adjust your logo.
Load More
→